
Summary
This is a software Serial step-by-step example for our team.
Full text
Now that we've completed the SerialPacketizer project it's time to put it to work on the hardware. Using the algorithm Ethan taught the club, all should be able to have a very robust communication between two devices via their serial ports.
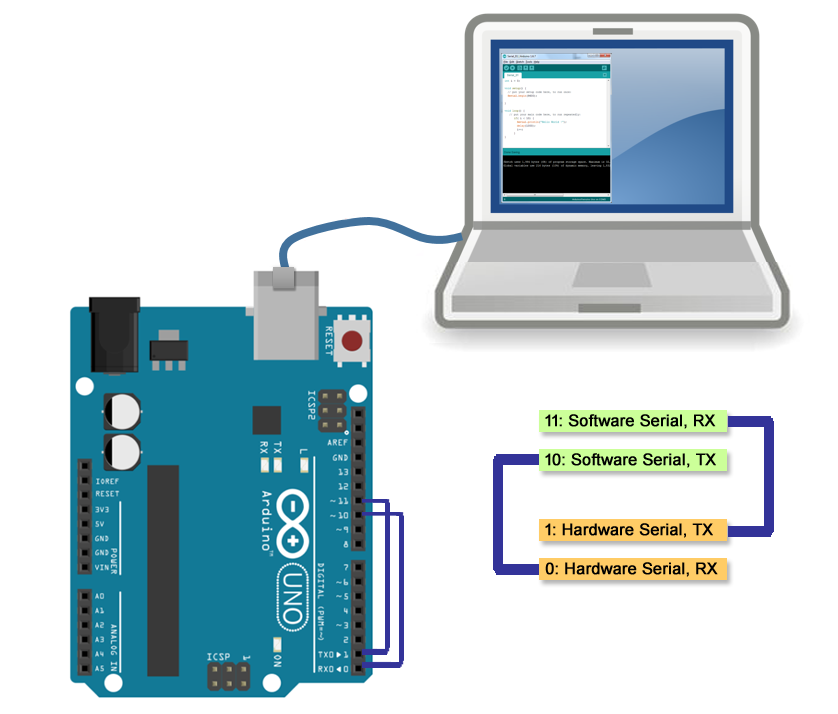
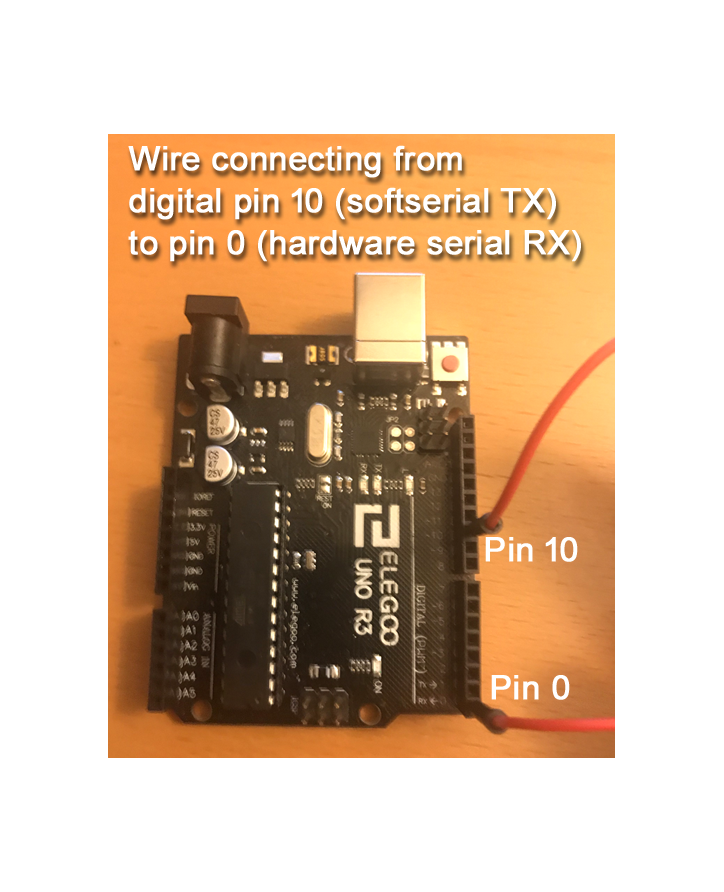
To connect your Arduino Uno to the computer, you need to establish a softSerial, and transmit from softSerial to the hardware serial port on your Uno. You only need one wire (male-to-male) to connect your TX terminal on your softSerial port to the RX terminal on your hardware serial port. The TX terminal on your hardware serial port will be used to send output messages to your computer. Note that you need to disconnect this wire when you upload your code to your Arduino from your computer.
There is a very useful online tutorial that shows how to connect Arduino to the softSerial on your computer. I tested it out and added more details below:
Hardware Requirements
- Arduino Uno Board
- Digital Pin 10 is used as a softSerial TX line and Pin 0 is the hardware serial RX line. Pin 0 is set set up to listen to anything coming in via the main serial line, and then echo that data out Pin 10.
- Digital Pin 11 is used as a softSerial RX line and Pin 1 is the hardware serial TX line. Pins 1 and 11 do perform the same activities as for Pins 0 and 10.
Programming IDE
- You can use Visual Studio Code (VSC) or Arduino IDE. I use VSC for coding.
Coding
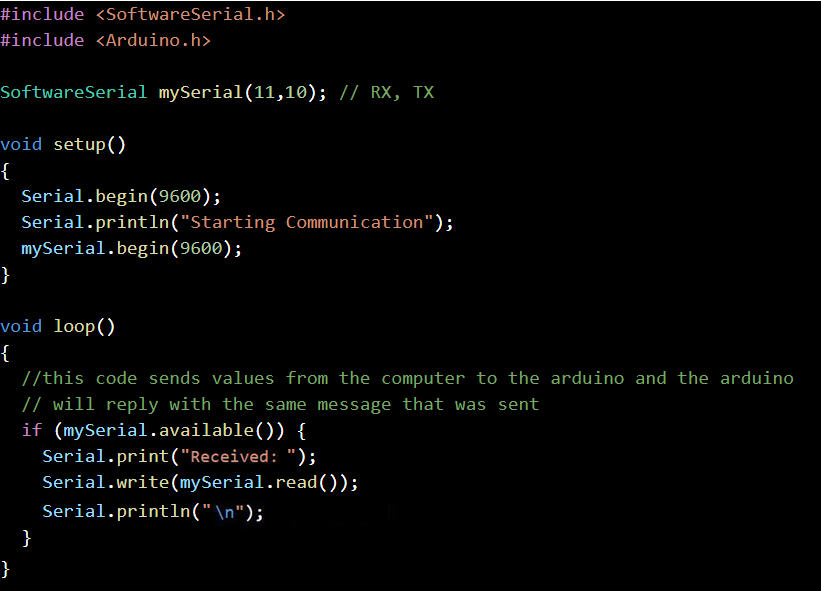
- Be sure to include softserial.h and arduino.h.
- In setup, begin both Serial and the softserial you created to 9600.
Testing Steps
- Connect Arduino UNO to the computer via USB.
- Download the code to Arduino (make sure the wire to the pins are unplugged).
- Plug in the wire to pins 0 and 10.
- Run the program in Visual Studio Code.
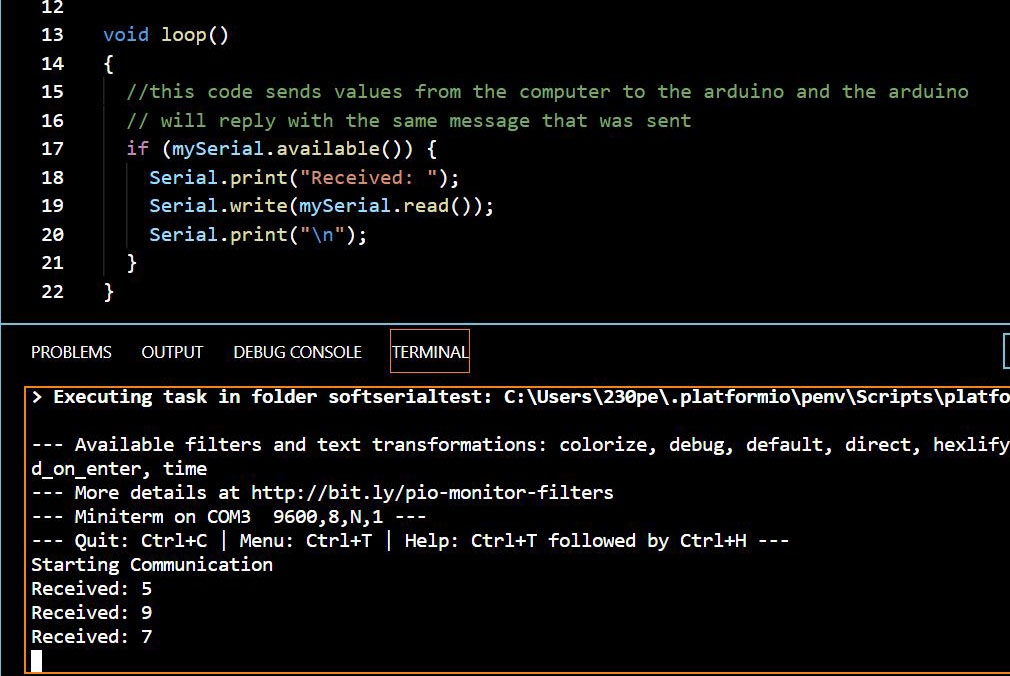
- Type some random numbers or letters on the output window.
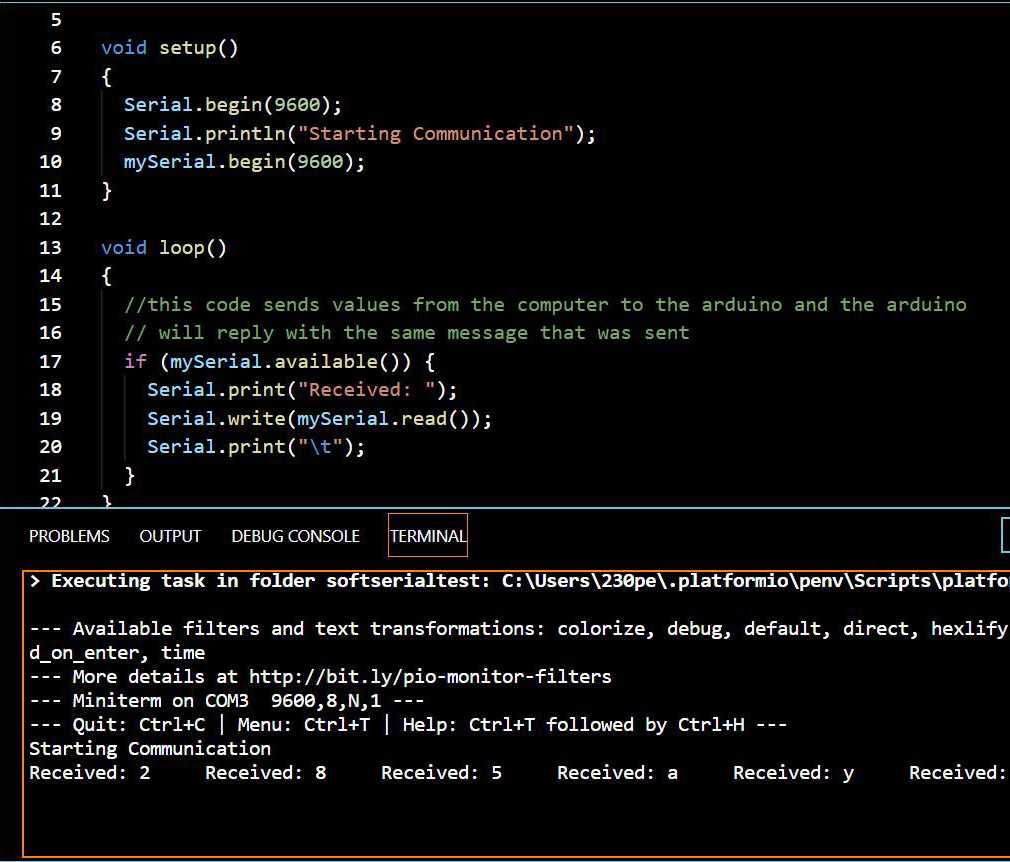
Results
- The bottom of the screenshots show the results. Note the random numbers and letters were sent from the computer to Arduino first then got printed out from the Arduino side.
Hope this guide helps with your programming with serial communication. Good luck!
Related Readings: https://www.arduino.cc/en/Tutorial/SoftwareSerialExample
About the author

Peter - Pie, a guy that likes.
Peter has been doing robotics since 5th grade. He currently learns Arduino and Raspberry Pi to further improve his robots. In his spare time he plays cello and tennis. He also enjoys playing Phantom Forces on Roblox with his friends.
More posts under Robotics